As the seasons change, I’m usually tempted to buy some fancy, festive décor. Even though I’m tempted, I end up wondering if I could make something myself instead. DIY décor is more unique, meaningful, and often more cost effective.
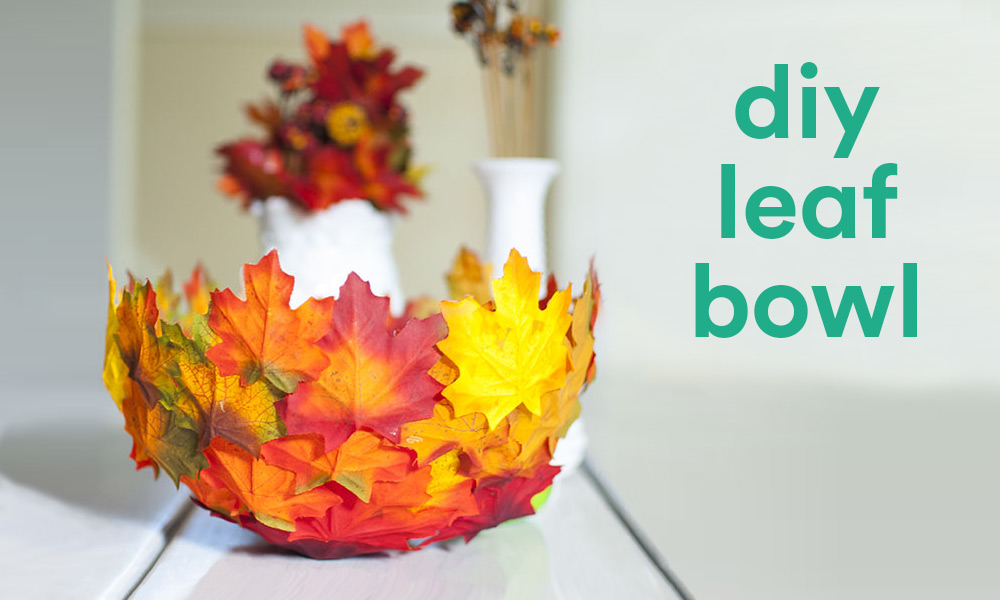
I thought it would be fun to create something to celebrate the bright colors of fall. Fall hues are beautiful and inspiring, but every year they seem to fade too quickly. This is a project to celebrate fall to the fullest, with bright autumn colors that won’t fade.
I got my supplies at the dollar store, and in total this project cost about $5. You can’t beat that! It took a little patience, but it was worth the result.
Here’s how to make a DIY leaf bowl . . .
Materials:
- 1 inflated balloon
- Faux leaves (2-3 dozen, depending on the size of your balloon)
- Large mixing bowl (to hold balloon)
- Painter’s tape
- Scissors
- Elmer’s glue
- Water
- Small cup or bowl (to hold glue)
- Foam brush
- Safety pin or needle
- Optional: disposable gloves
Directions:
- Start by cutting individual faux leaves off of their branches.
- Carefully pull the plastic stem and veins off of each leaf entirely.
- If any of your leaves are bent, place them between two sheets of wax paper, cover with a thin tea towel, and iron on low to medium heat. This will help the process later. (Skip this step if leaves are already flat.)
- Take your inflated balloon and place it in a mixing bowl (tied end pointing down). Using painter’s tape, secure the balloon evenly to the bowl so that it’s level and flat on top since this will be the shape of your bowl.
- In a separate small bowl, combine 4 parts Elmer’s glue with 1 part water. (If you want to be really crafty like me, this is the time to put on those disposable gloves to protect your hands from a seriously sticky situation.)
- Using a foam brush, apply the glue and water mixture to part of the balloon and each side of the faux leaf. Press the leaf onto the balloon (curved conforming to the balloon). The leaf may not stick to the balloon perfectly or evenly, but that’s okay. If any leaf corners are sticking up significantly, hold them down for 30 seconds with your fingers until the glue dries a bit. I learned it helps to be patient and not worry about it being perfect.
- Repeat this process in layers of leaves so that there are no large gaps. The more overlap and layers of leaves, the stronger your bowl will be. Arrange the leaves by colors or however you’d like.
- Let the balloon and bowl sit for a few hours (or overnight) until the glue is completely dry.
- With a safety pin or needle, slowly deflate the balloon near the tied end. Gently separate the balloon from the leaf bowl.
- Remove any large flakes of dry glue. (If you want to make it extra sturdy or shiny, you could spray it with a clear gloss at this point, but I kept it simple and as is.)
- Place on a table and enjoy!
While this is more of a sculptural piece than a functional bowl, I love how it turned out. It’s a fun way to celebrate fall with vibrant colors all season long!


